
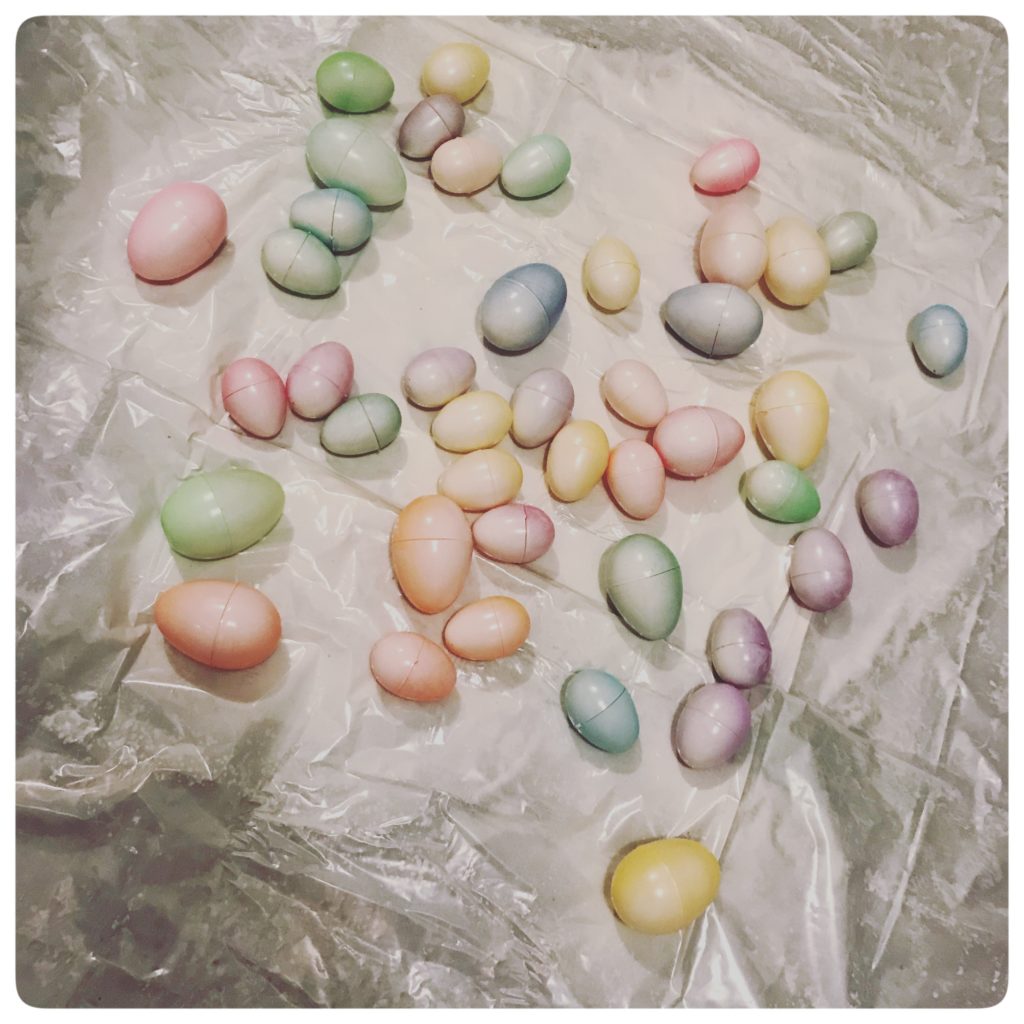
Over the years I have somehow acquired more plastic Easter eggs than any one person should have. From having them for Jake, using them for classroom projects with the kids, I probably have close to 100 eggs. They vary in size and quality, but truth is…I hate them. Don’t get me wrong, they certainly have their main purpose — candy and crafts, but for my own decor purposes I was never happy with them. I will probably dye real eggs at some point (by myself because no one else in the house appreciates that sort of thing) but I really wanted to find something else to do with the plastic eggs. Something I could reuse each year that looked less bright and vivid and more pastel and pretty.

I love decorating for spring and Easter. My mom did too, which is one of the reasons I enjoy it so much. But those eggs, something had to be done. I looked on Pinterest and found some great tutorials and ideas on what I could possibly do to make these eggs a little more attractive. It wasn’t about finding the easiest or even the cheapest project. It was about changing the existing eggs I already had. I had people messaging me, telling me I should just use wooden eggs, or paper mache eggs because it was easier. It wasn’t about being easy; I wanted to use what I had.

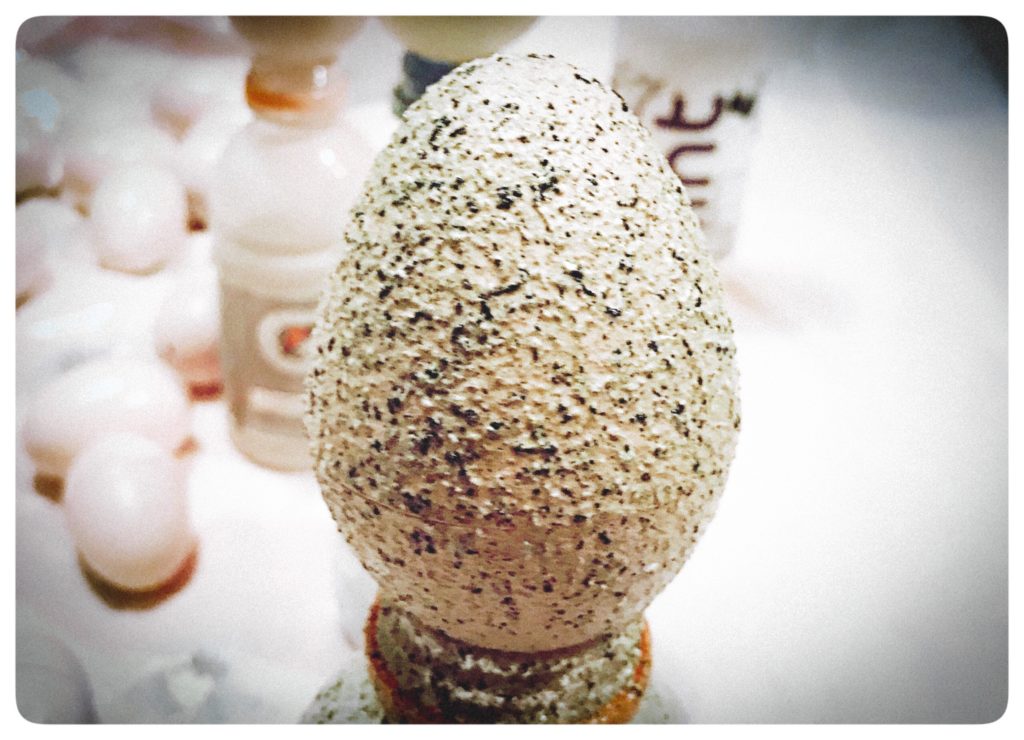
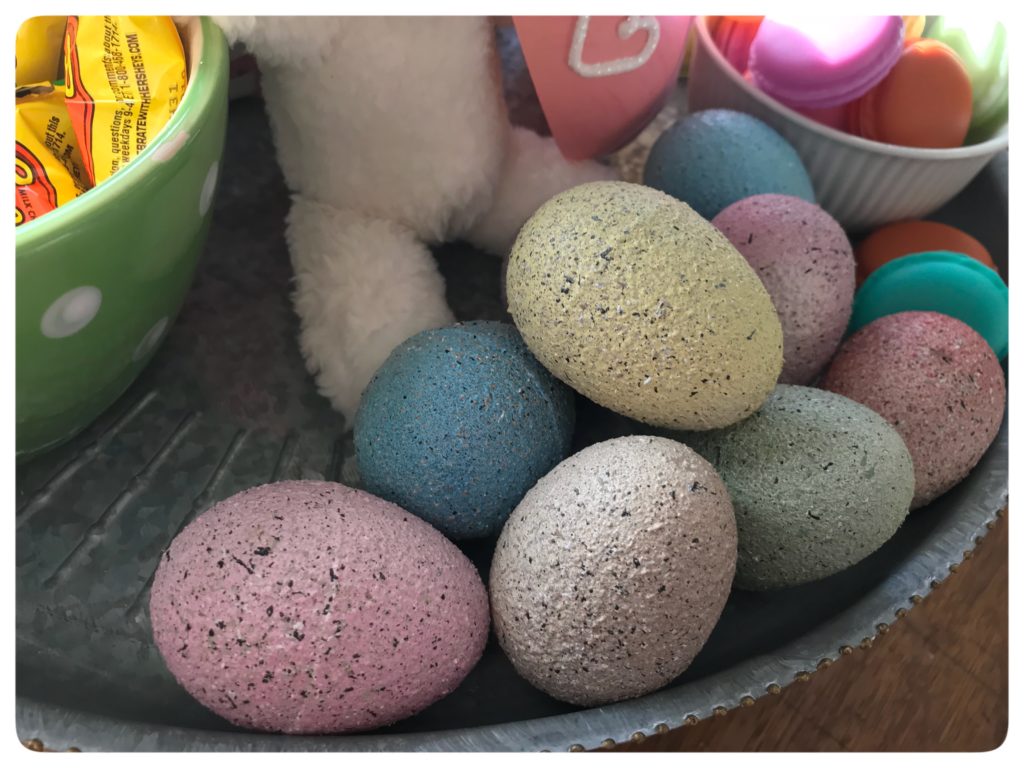
One post in particular seemed like it might work for what I wanted to do, from The V Spot blog. This was for making the plastic eggs more like robin’s eggs (which it did and was amazing). I was okay with having some more pastel, lighter colors. They didn’t have to look real. What I did take away from the tutorial was I had to go find some textured spray paint. If you haven’t used this stuff, it is a must-have for my spray paint collection. Not sure why I never tried it, but I hadn’t and I wish I had sooner. This stuff is great not only if you want to add texture to something, but it also hides textures you don’t want seen — like the seam of a plastic egg.
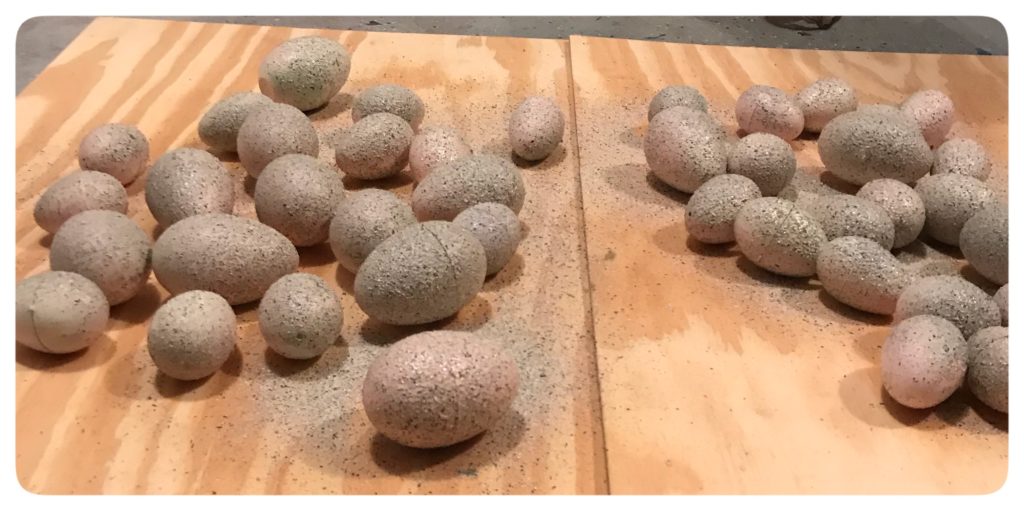
This is not a project you can knock out in a day. It’s a project to set up in the garage and leave it so you can spray a layer of spray paint and leave it and go do something else for a couple of hours. I am not a patient person and this was hard for me.
For my project, I ended up using spray paint only — several different kinds, but nothing but spray paint. This just worked better for me. The finished result was just what I was hoping for. Perfect? No. But I love seeing these little eggs in my 3 tier display on my table. I was also able to reuse the eggs I already had, which makes me happy.

For this project, you will need:
textured spray paint (I used Rustoleum American Accents, stone textured finish, in stone pebble) The link provided here is for gray stone, which will work just fine, you probably want to stick with something light in tint to look more natural
plastic eggs
adhesive that will adhere to plastic (I used E6000)
surface you can spray paint on (I started with a plastic tarp and ended up going with scrap plywood)
spray paint of any color that adheres to plastic
spray paint in whatever colors you want your eggs to be. I chose several pastel colors I already had.
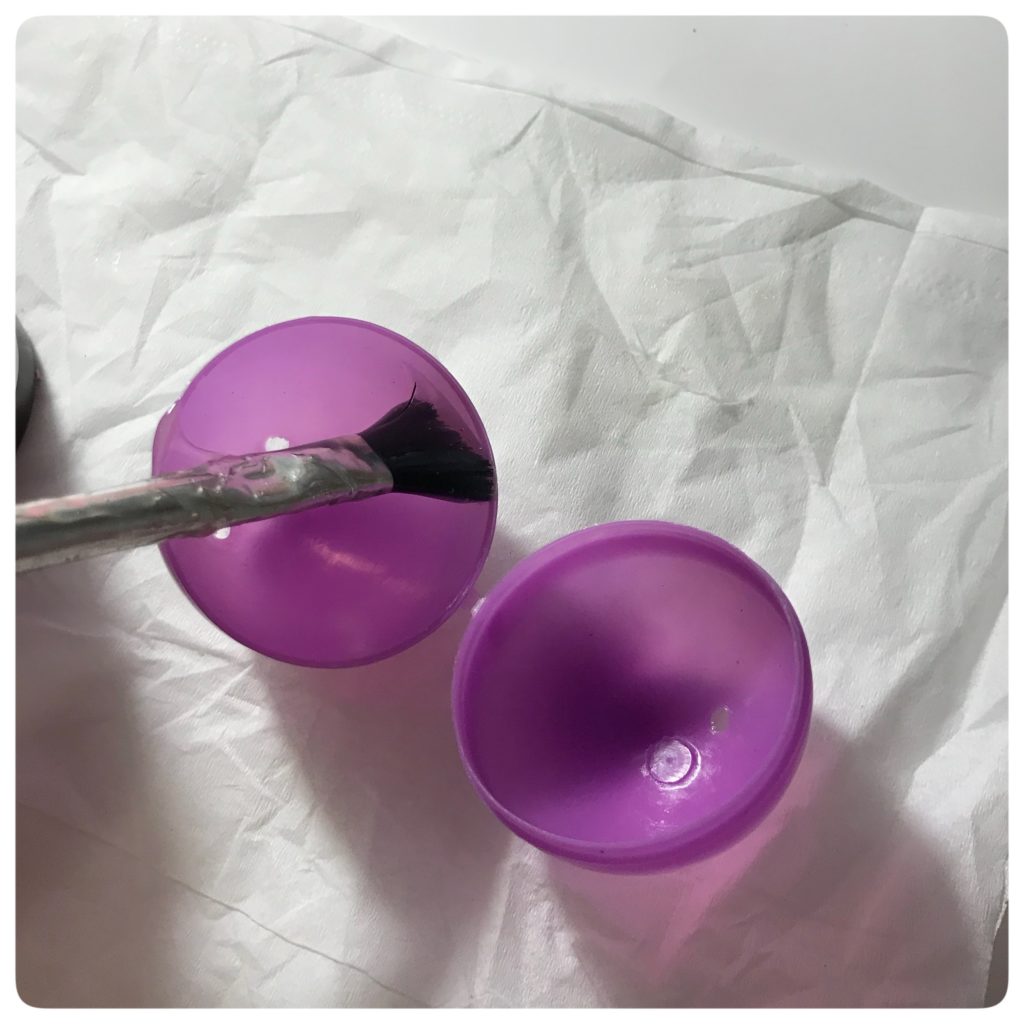
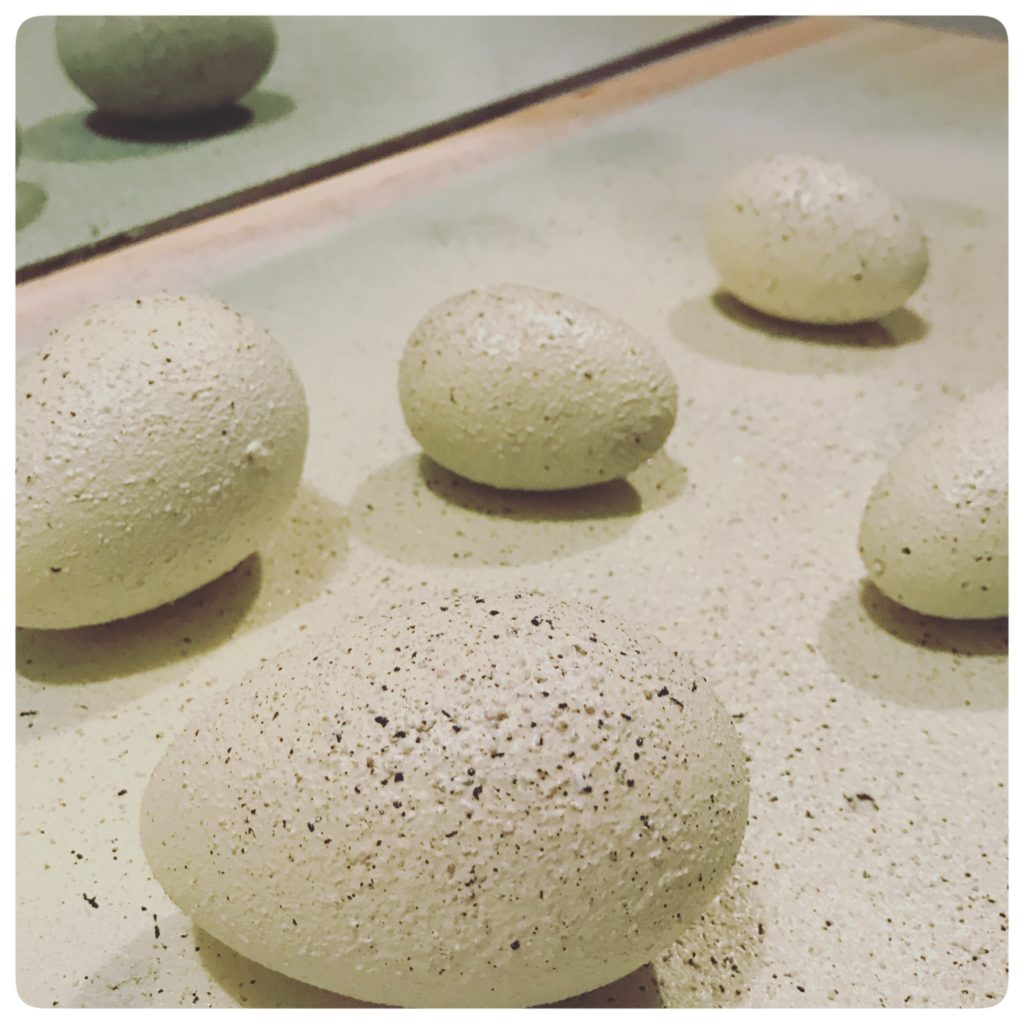
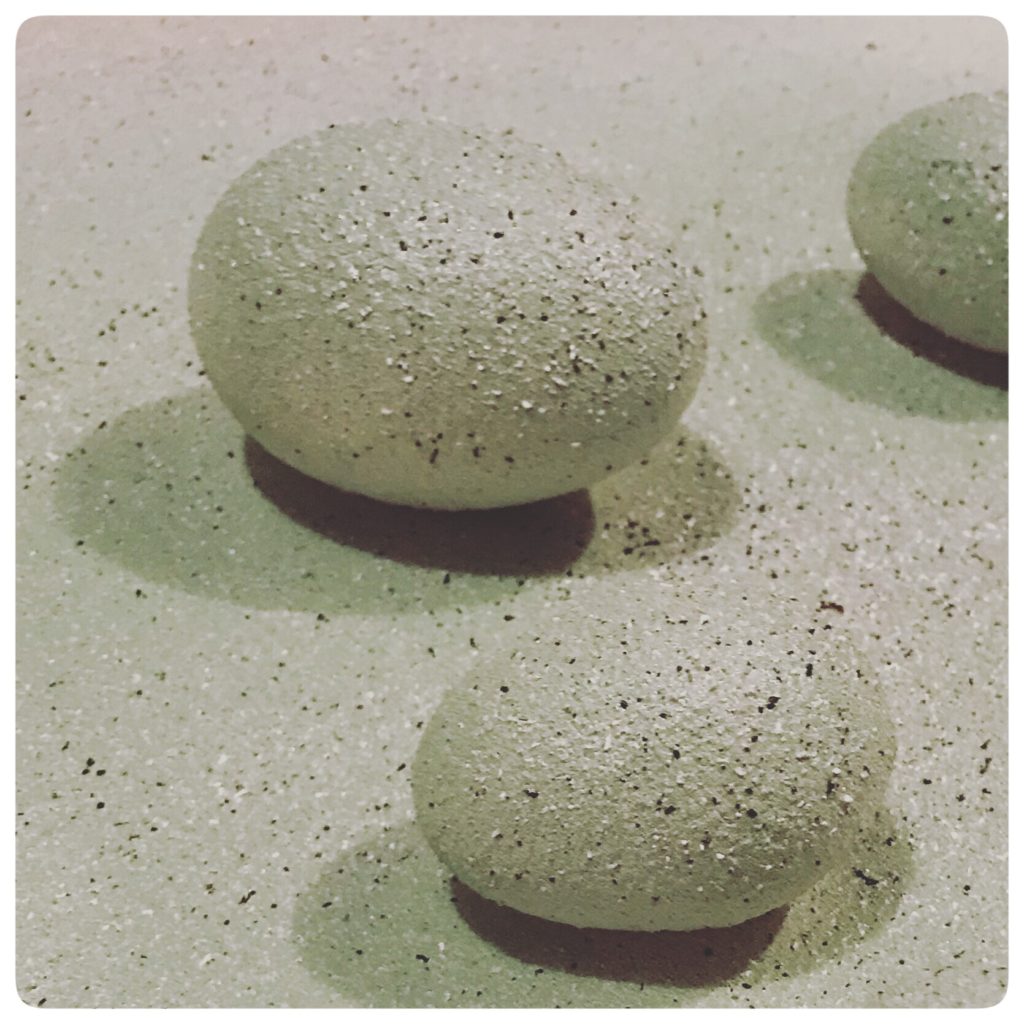
Don’t worry if you mess up and over spray either your egg color or the textured spray on top of that. Just keep alternating your color and the textured spray paint until you get the mix you’re happy with. I messed up several times and while I had to wait for my mistakes to dry, I think it helped cover the middle seam a little better because there was more paint. So you really can’t mess this up. It’s a little trial and error, but once you get the hang of it, it’s pretty easy.
This was a fun project (they always are when you get the result you want, right?) I will definitely reuse these eggs next year assuming they hold up okay with time and temperature change out in the garage. We shall see. I was also thinking about doing another batch and maybe gluing the eggs to a grapevine wreath for the door. Happy spring!!!!!