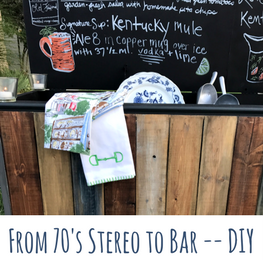
Converting this old stereo to bar, was definitely a labor of love and probably one of the hardest and time-consuming project I have ever tackled. I speak for myself and not for Amanda, but I learned a ton and I think all the time invested was definitely worth it. This was such a huge project that we’re going to have to do it in two posts, otherwise it would just be too long.
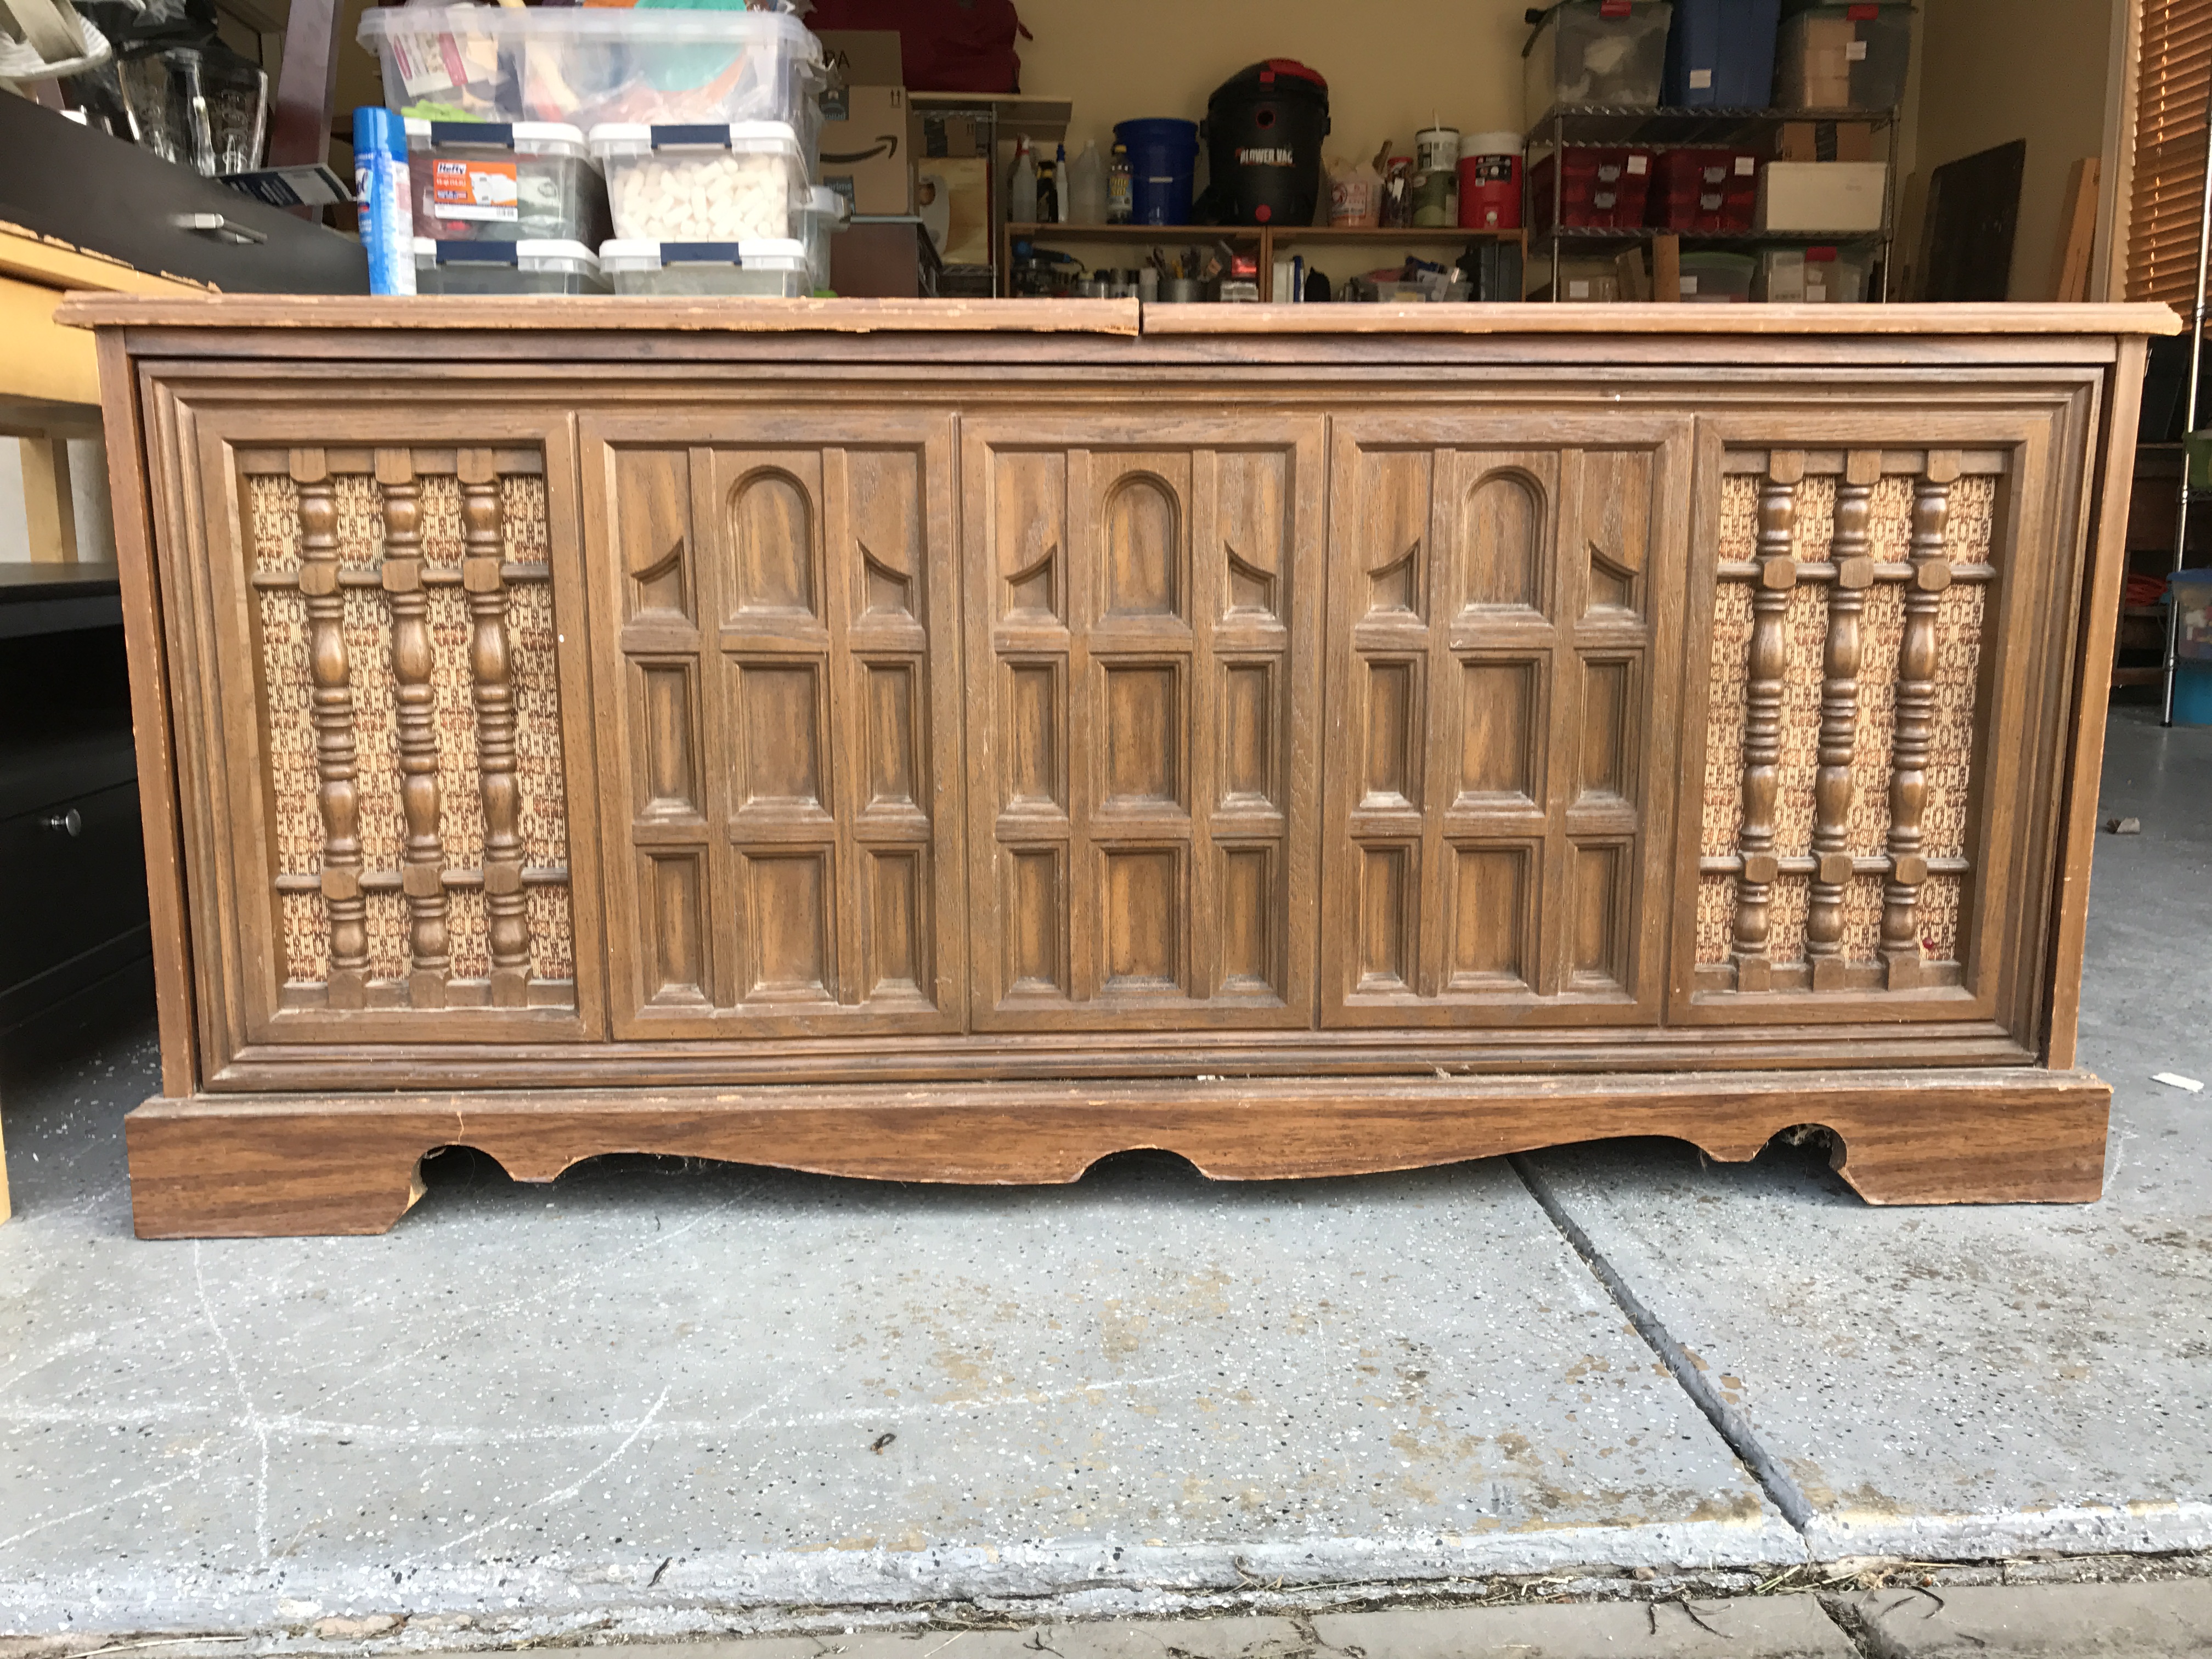
Tricia and I picked this stereo up in Lexington from the curb last December. It was SO HEAVY! I have no idea how in the world we were able to lug that thing in the back of her SUV, but somehow we did it. It was awful. It smelled like the 70’s. I can’t tell you what that smells like, but I know it when I smell it. You’ll have to trust me on that. I Febreezed the heck out of that thing!
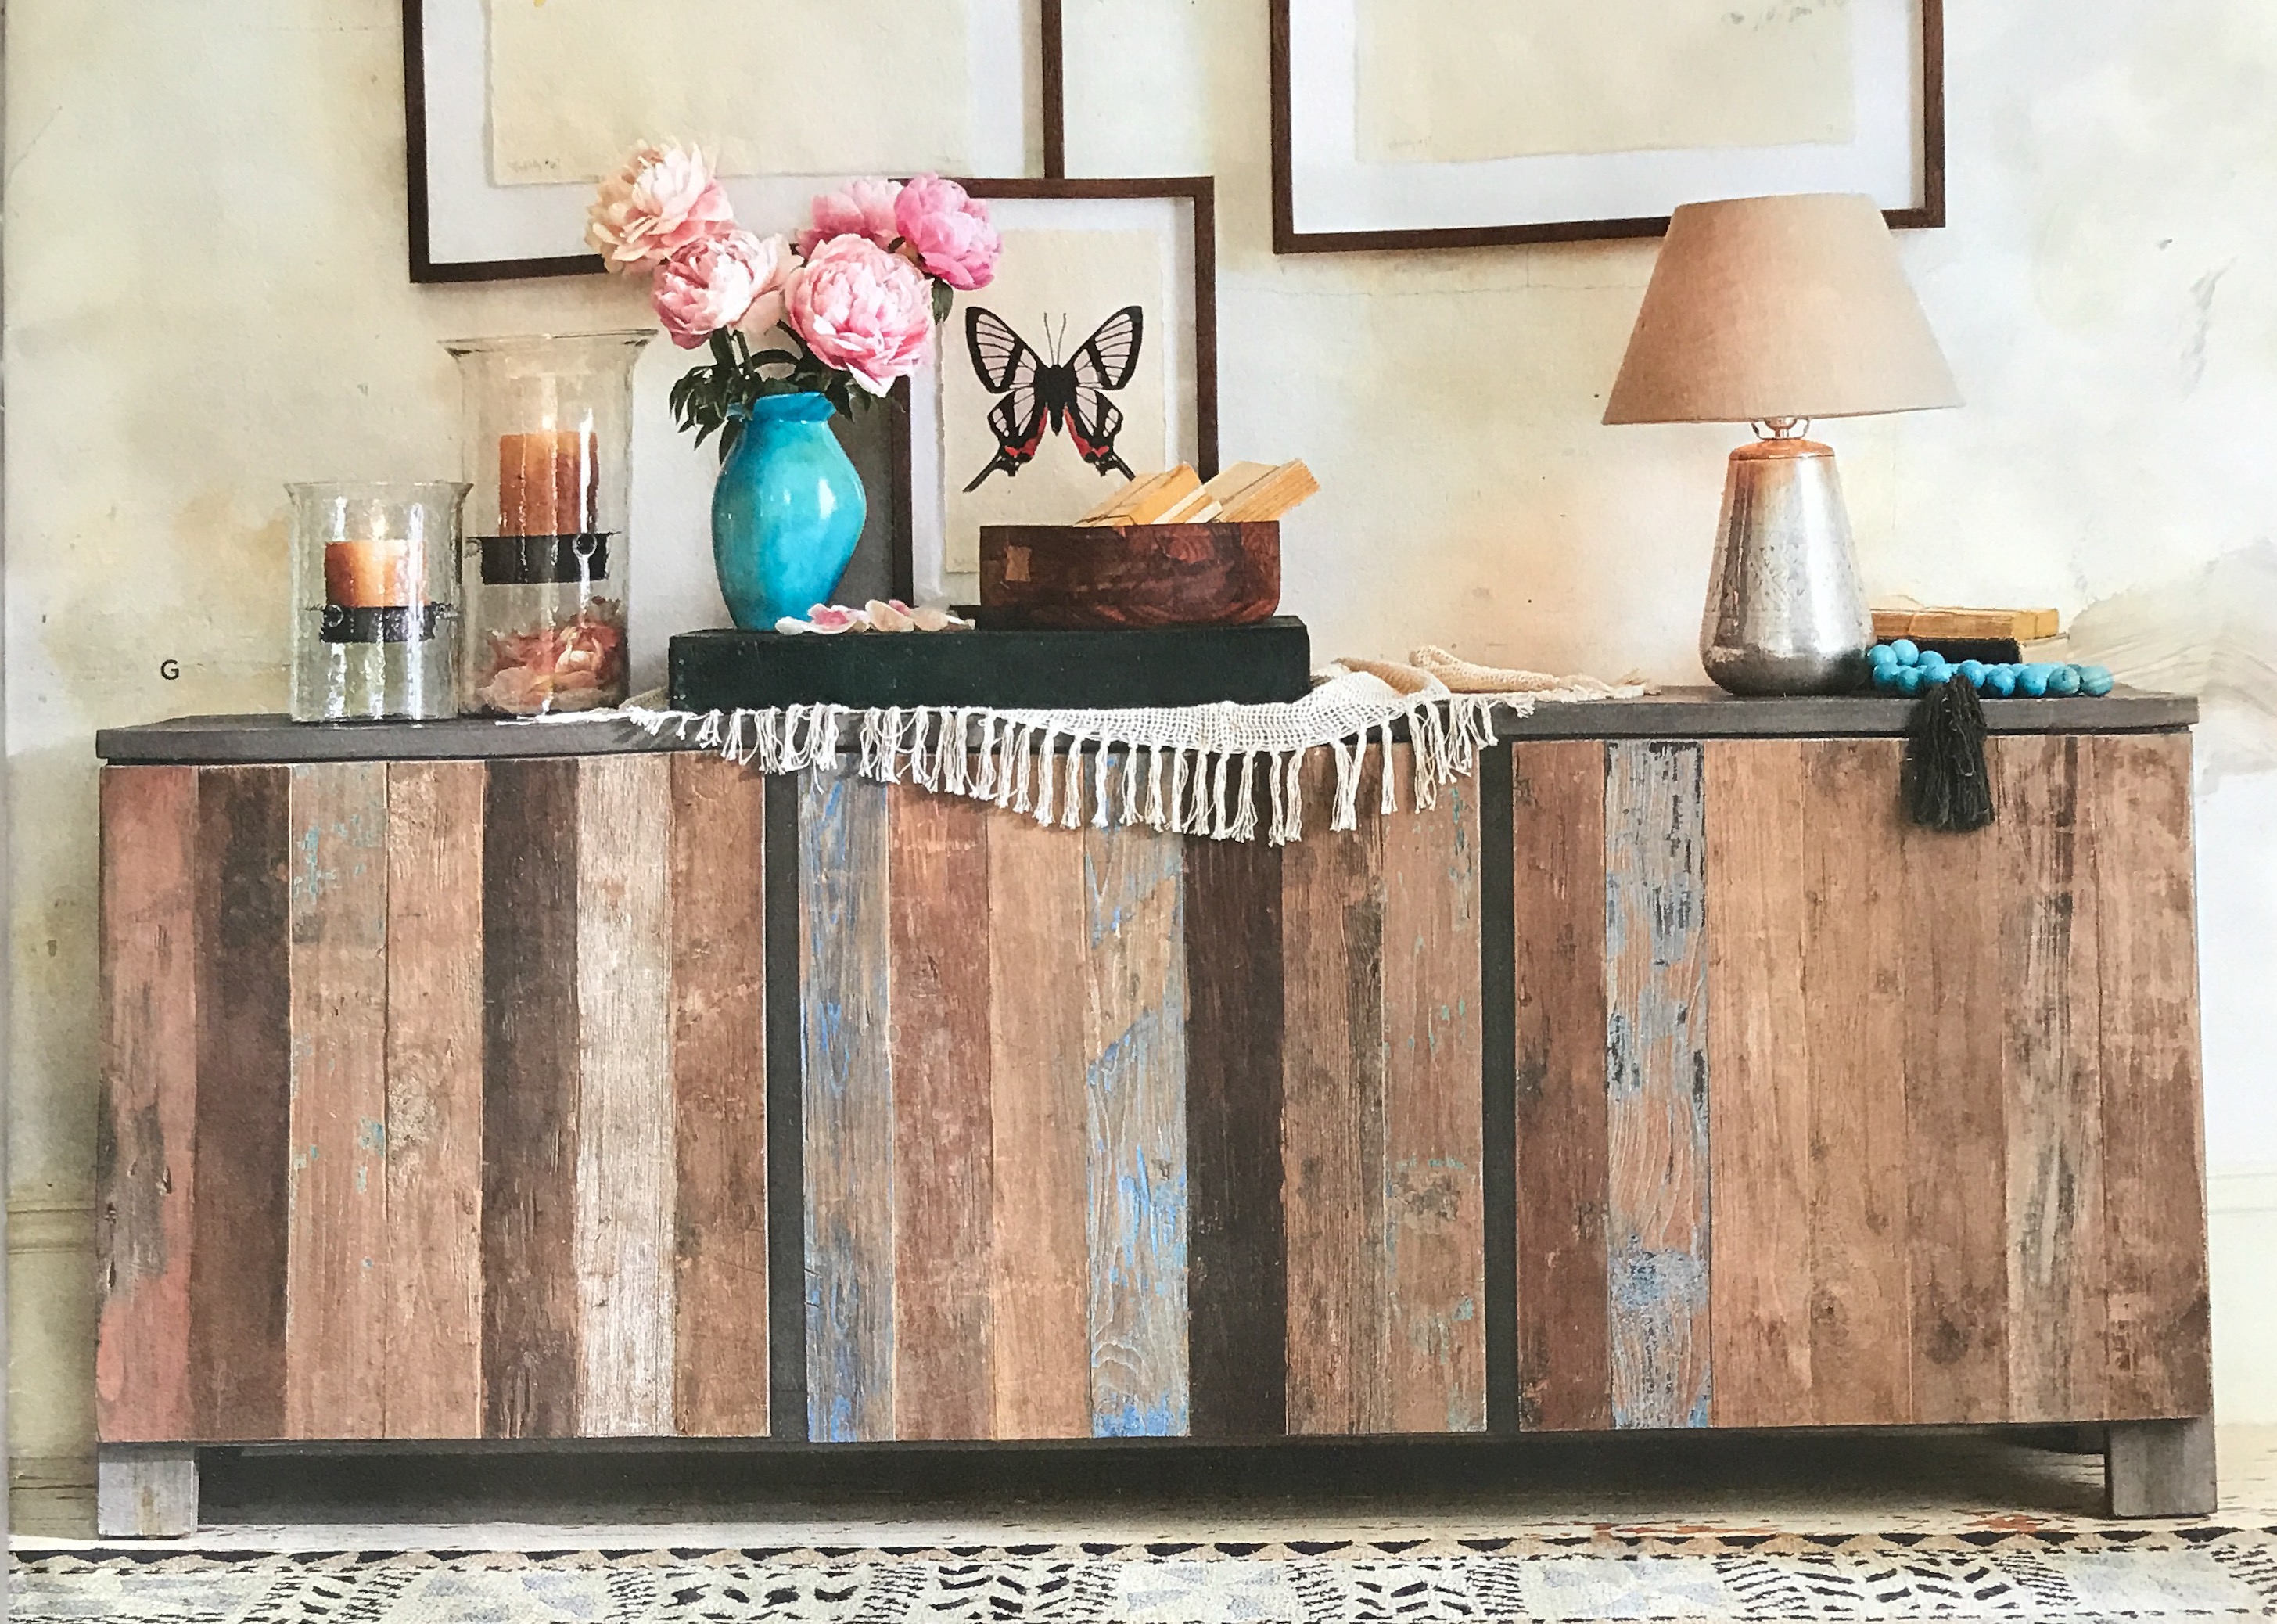
I found a photo in the Sundance catalog that would provide us with our inspiration for the project.
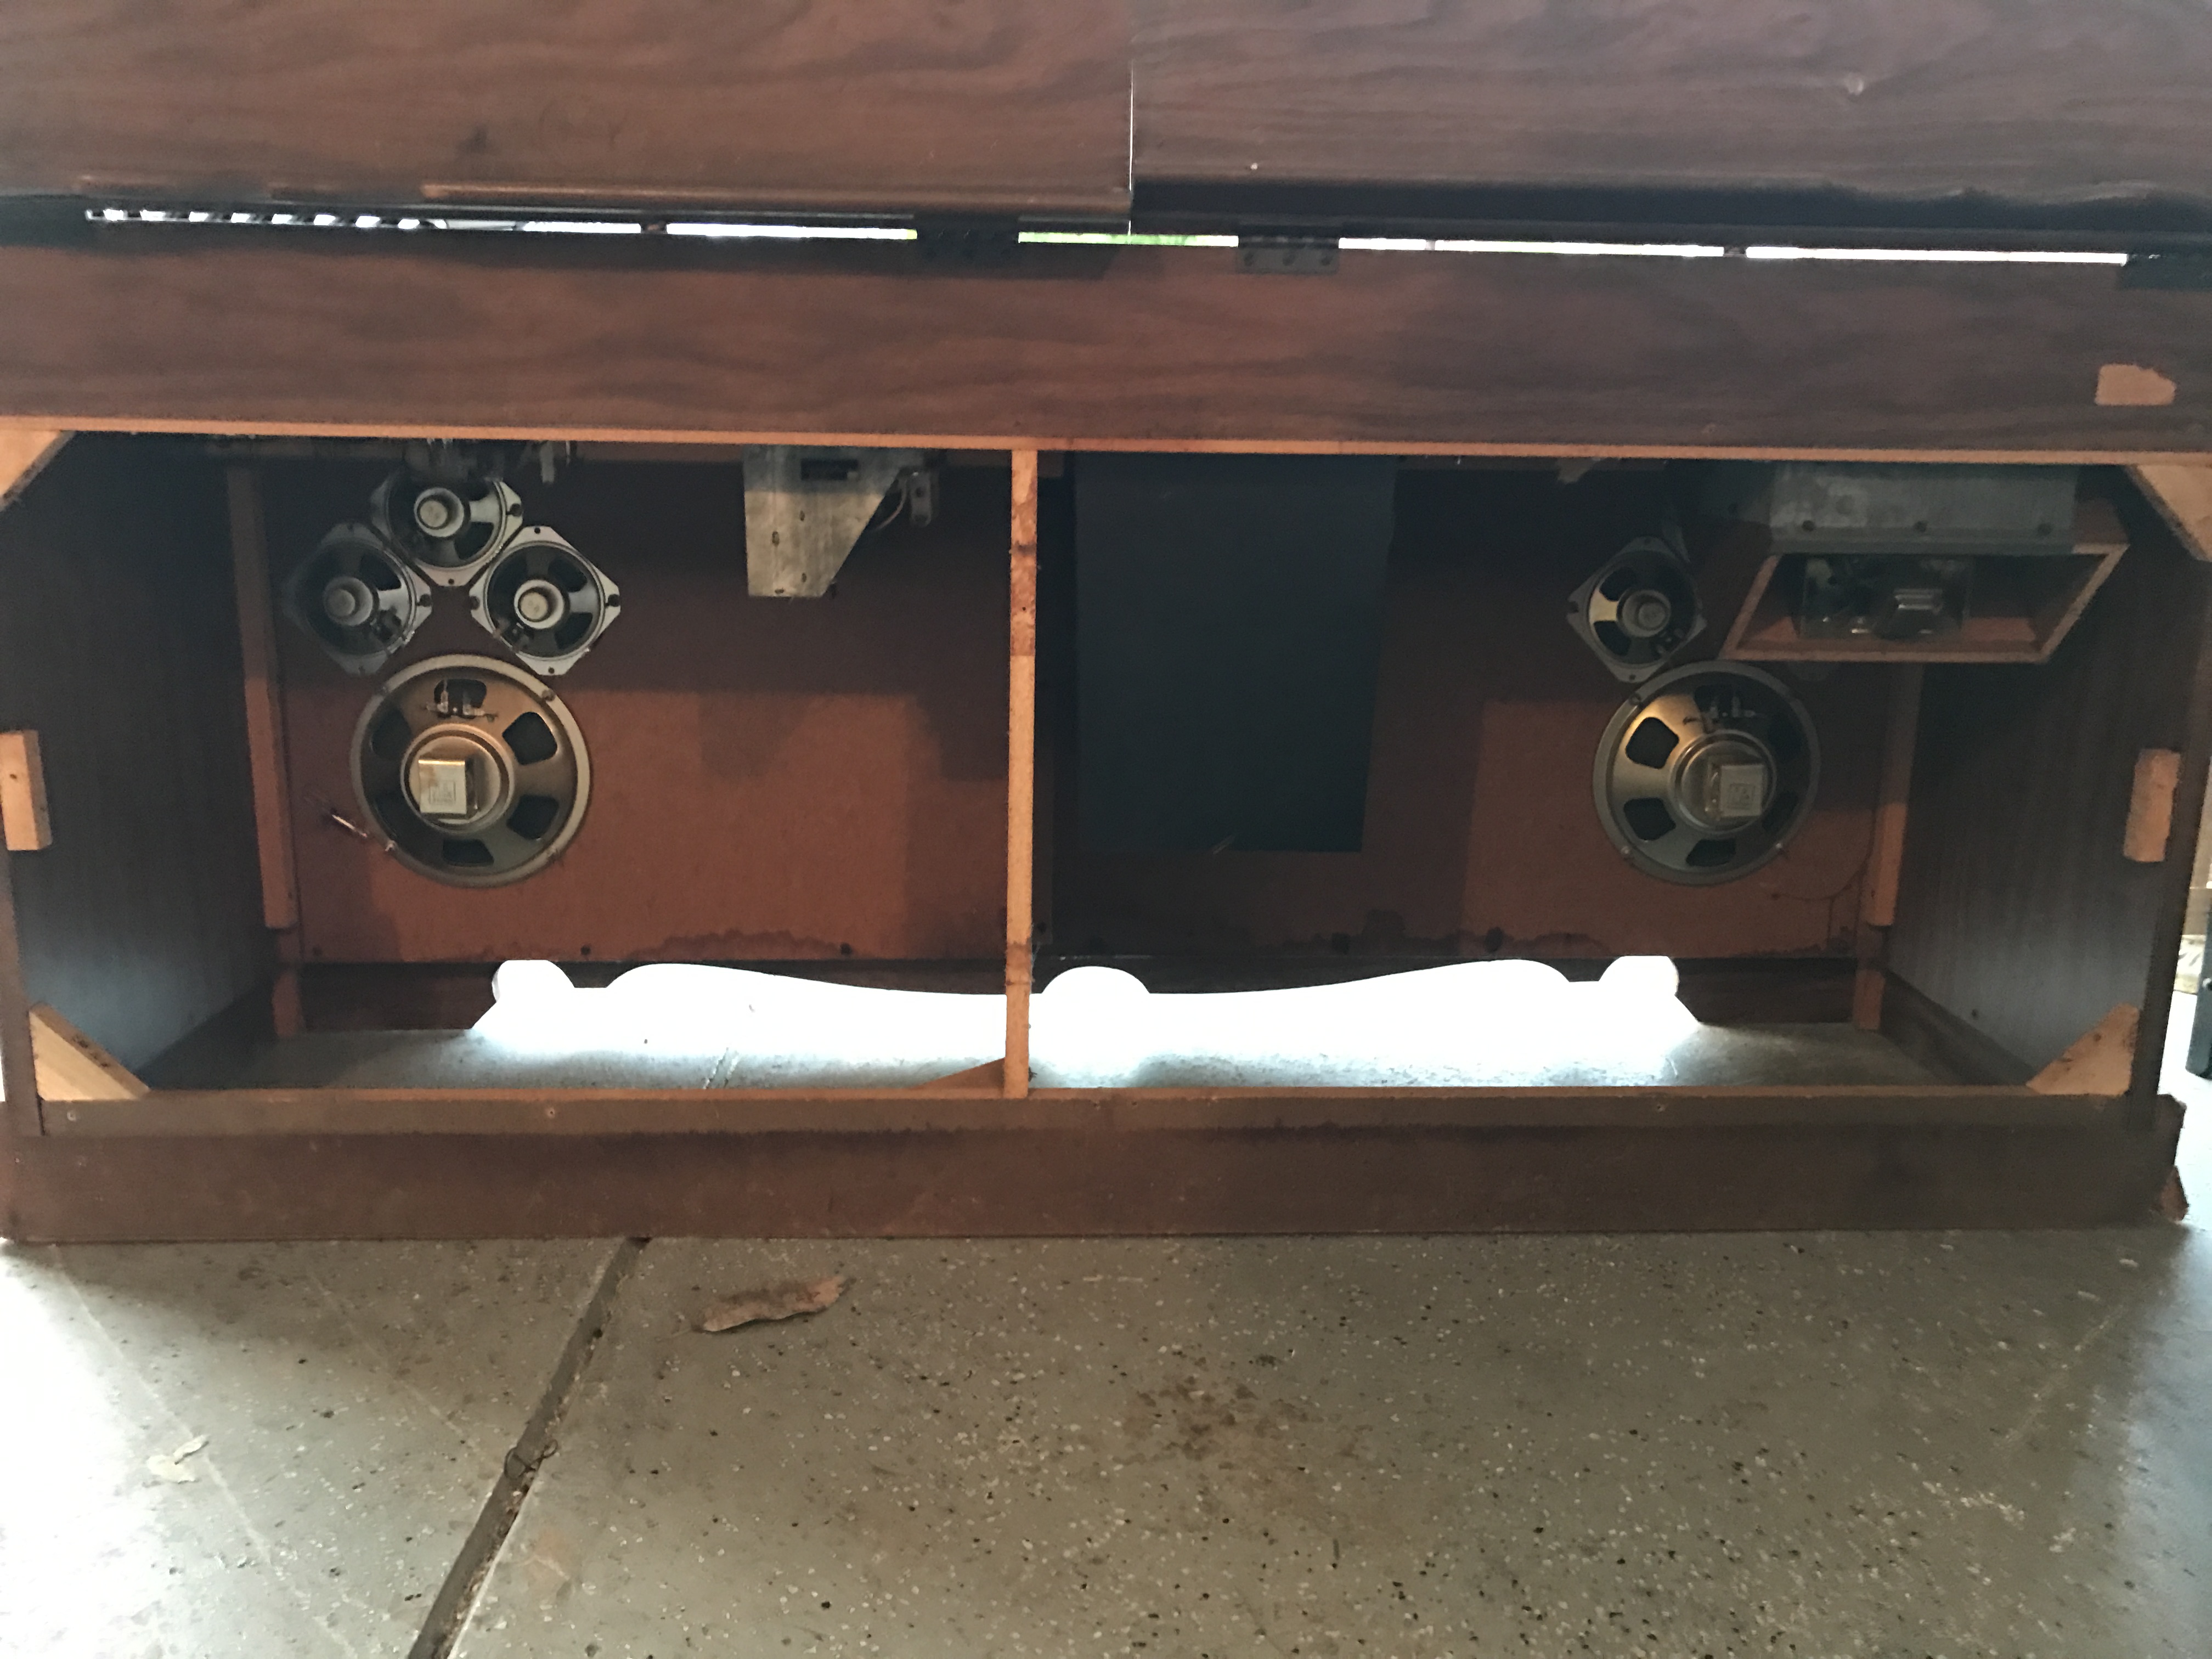
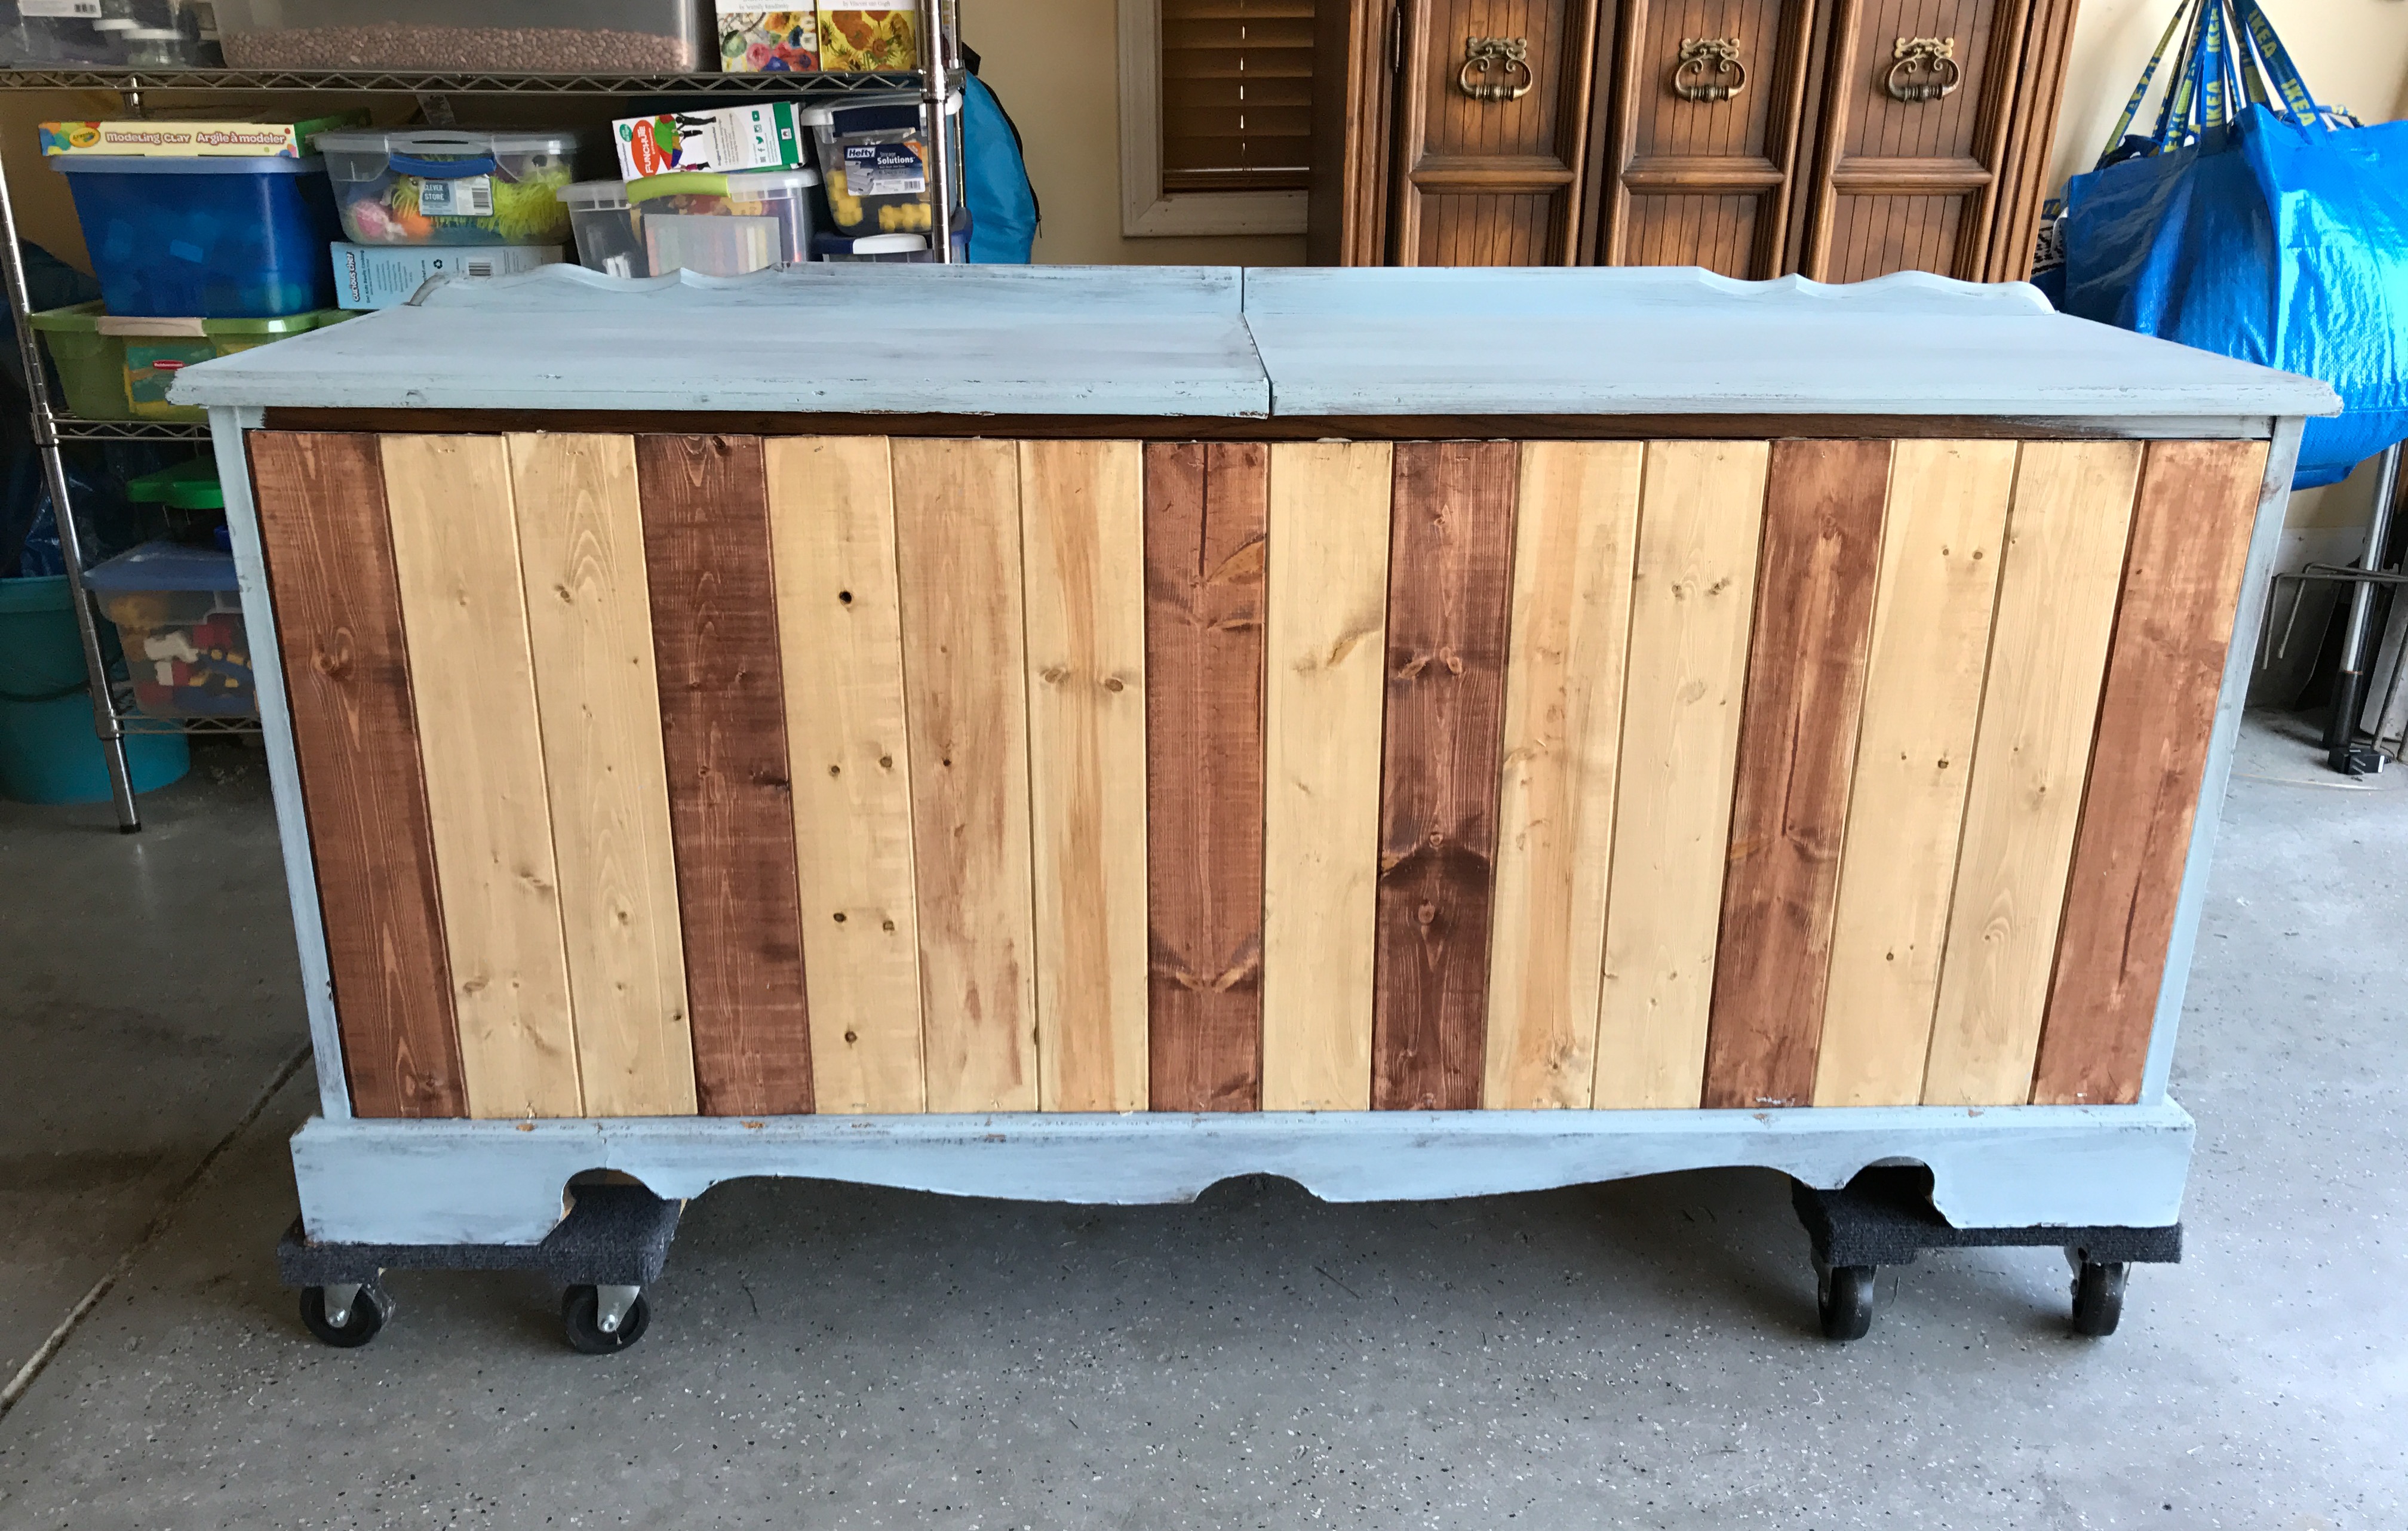
First thing I did was remove the back and the “guts” as much as I could. Amanda and I decided on a tentative plan (the deep compartment was to be where the ice would be stored, the turntable would remain and be used for displaying liquor bottles, where the 8-track was would be used for wine storage, the radio would be removed and a cutting board on top of it, we would add wheels to the bottom, and the inside of the doors would be spray-painted with chalkboard spray paint so we could write the menu and drink recipes for the photoshoot). I removed the speakers and everything else I could to make it easier to move around and we set it on two small dollies so we could roll it, which made things tremendously easier.
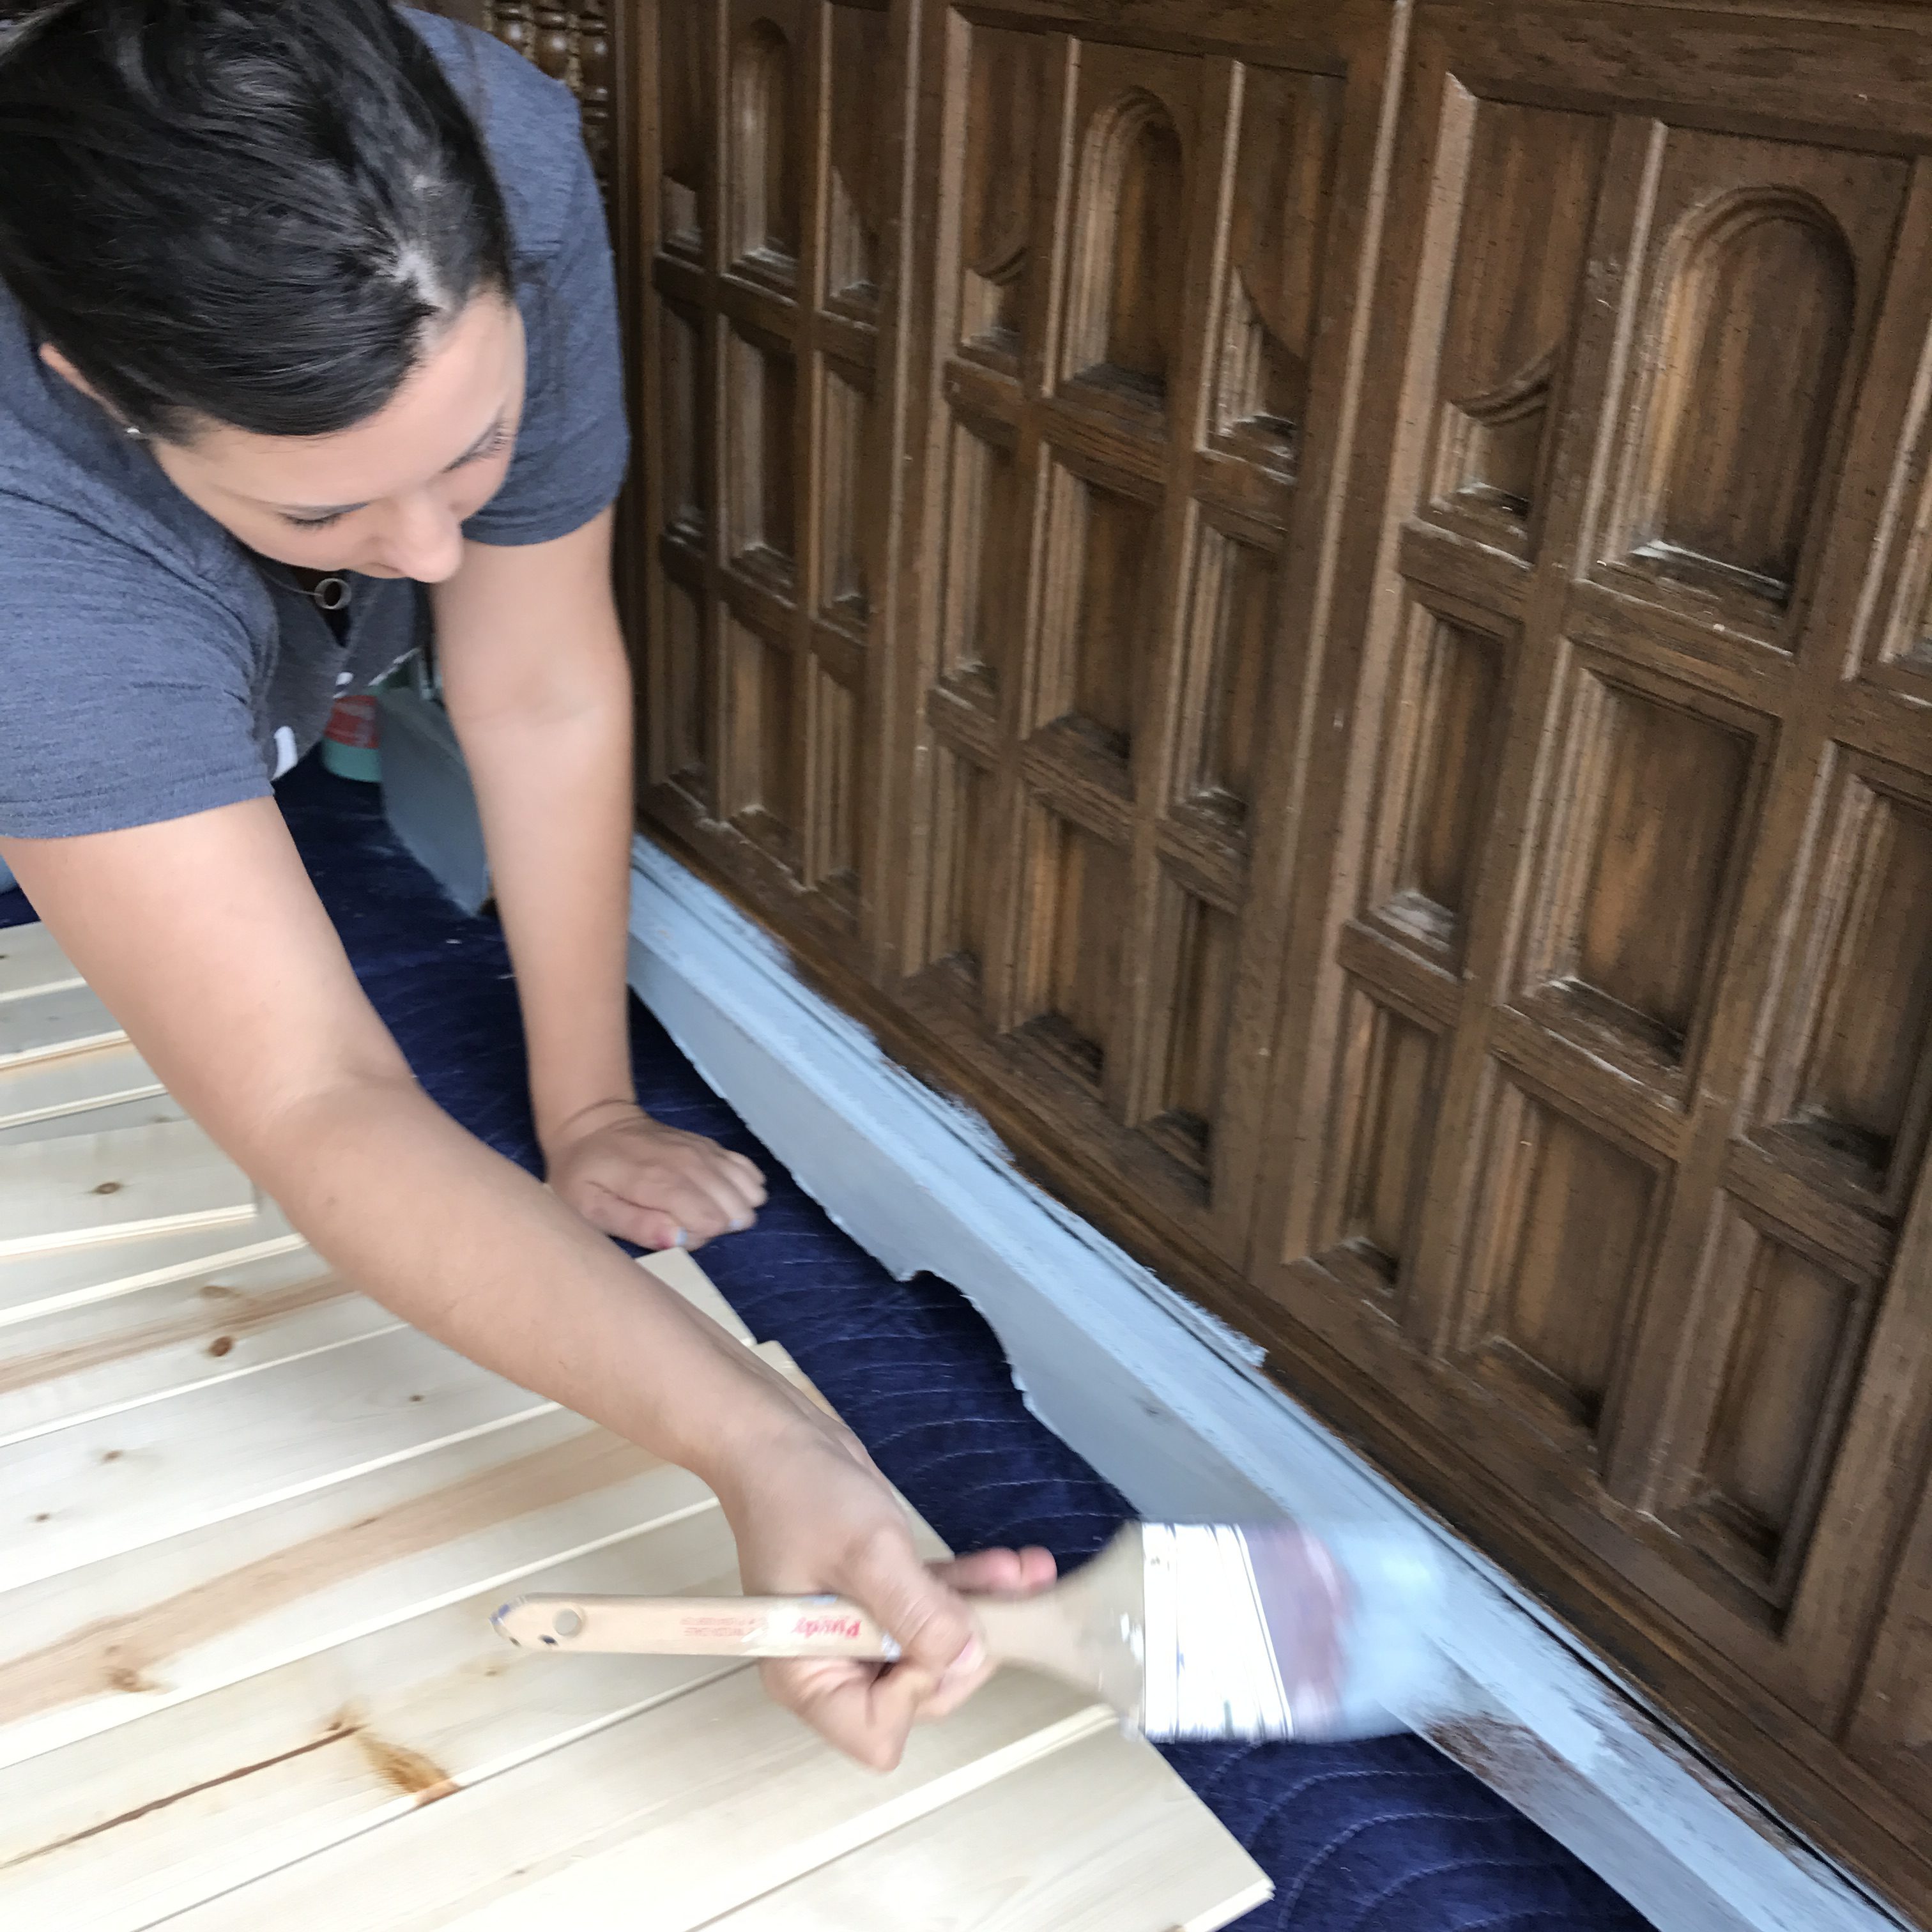
Now we had basically a clean slate. We started painting two coats of chalk paint onto the outside of the stereo and we later decided that we weren’t thrilled with the color so we opted for a darker gray latex paint that looked gorgeous. I did some repair work on the edges and bottom using sandable, paintable wood putty and a putty knife to help fill in some places that had chipped or broken off. You don’t want to use that for larger places, but to use to fill in small places, it works great. Just remember to put on a little at a time and to wait until its completely dry before sanding. Once you sand (I like to use a sanding block for this type of job) and then it doesn’t look quite right, use the putty knife to add more and shape it to what you need.
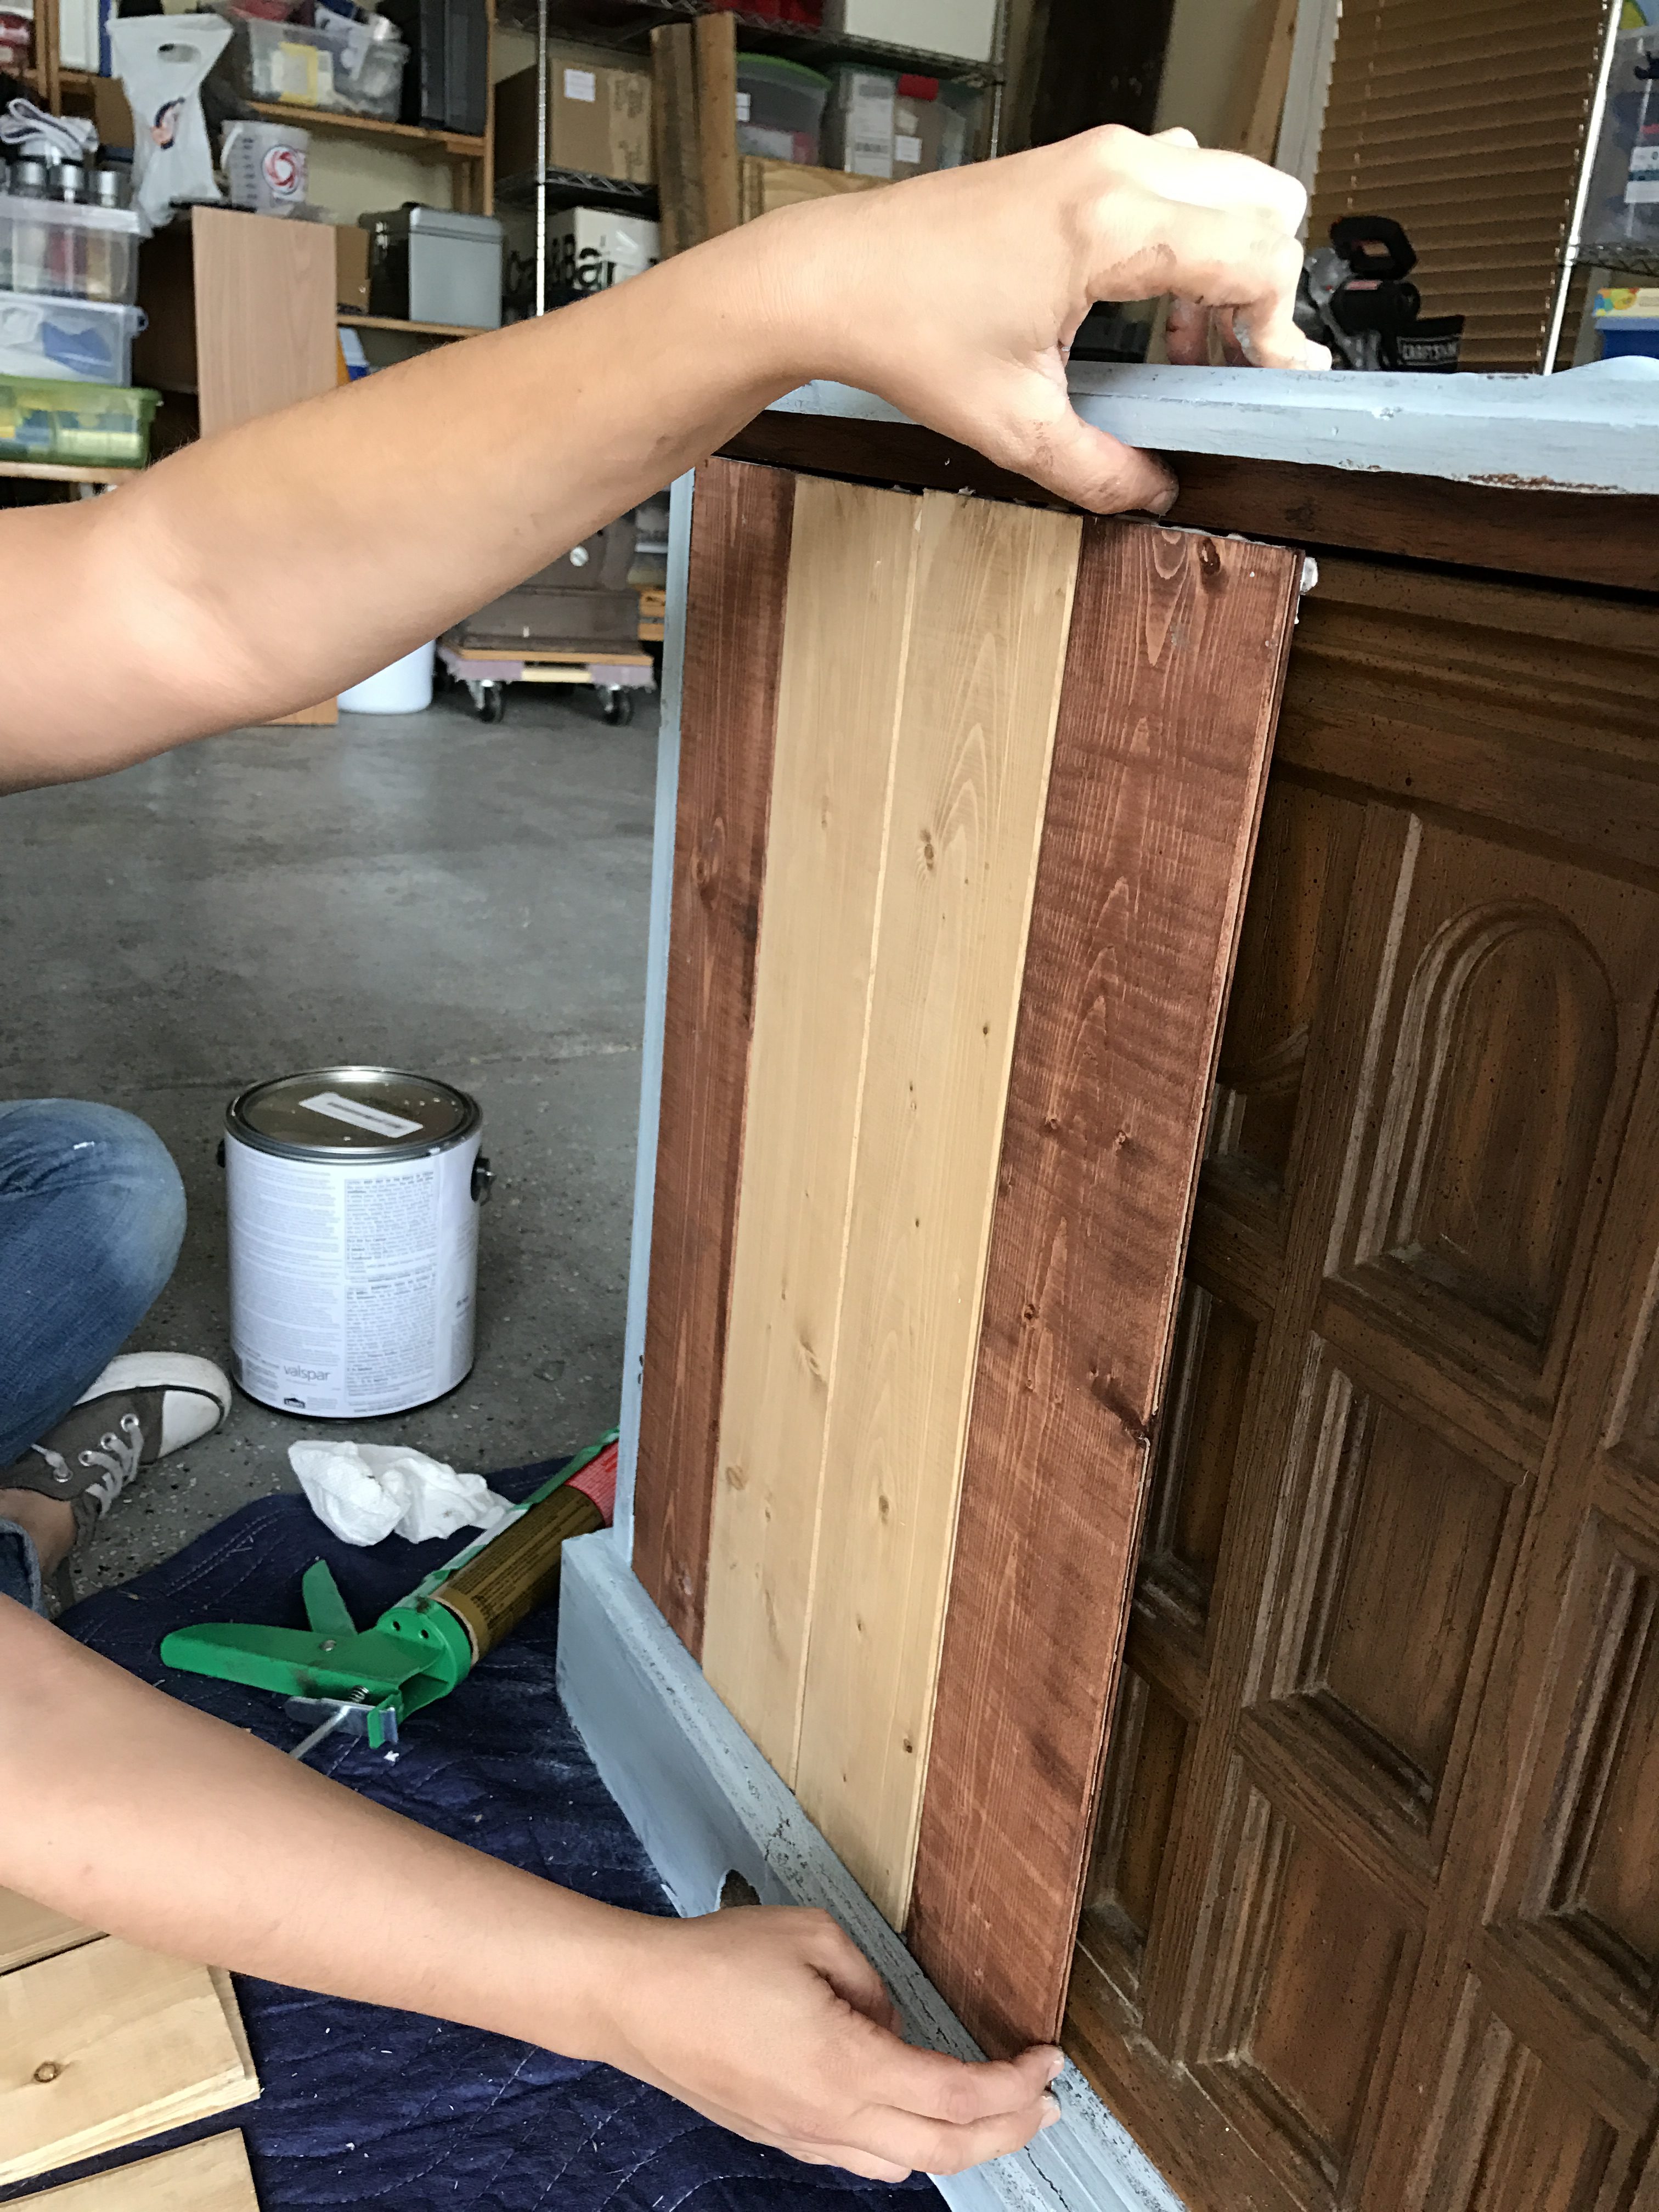
Once that was done, it was time to do SOMETHING with the hideous front of the console. Since we had the catalog photo for our inspiration, we knew we would use shiplap to cover the front, but we had to stain some of the planks to make it look like our photo from the catalog. I happened to have some leftover shiplap from the staging wall that A.J. and I did a few weeks ago. Using a miter saw and measured the height of the cabinet and cut our shiplap.
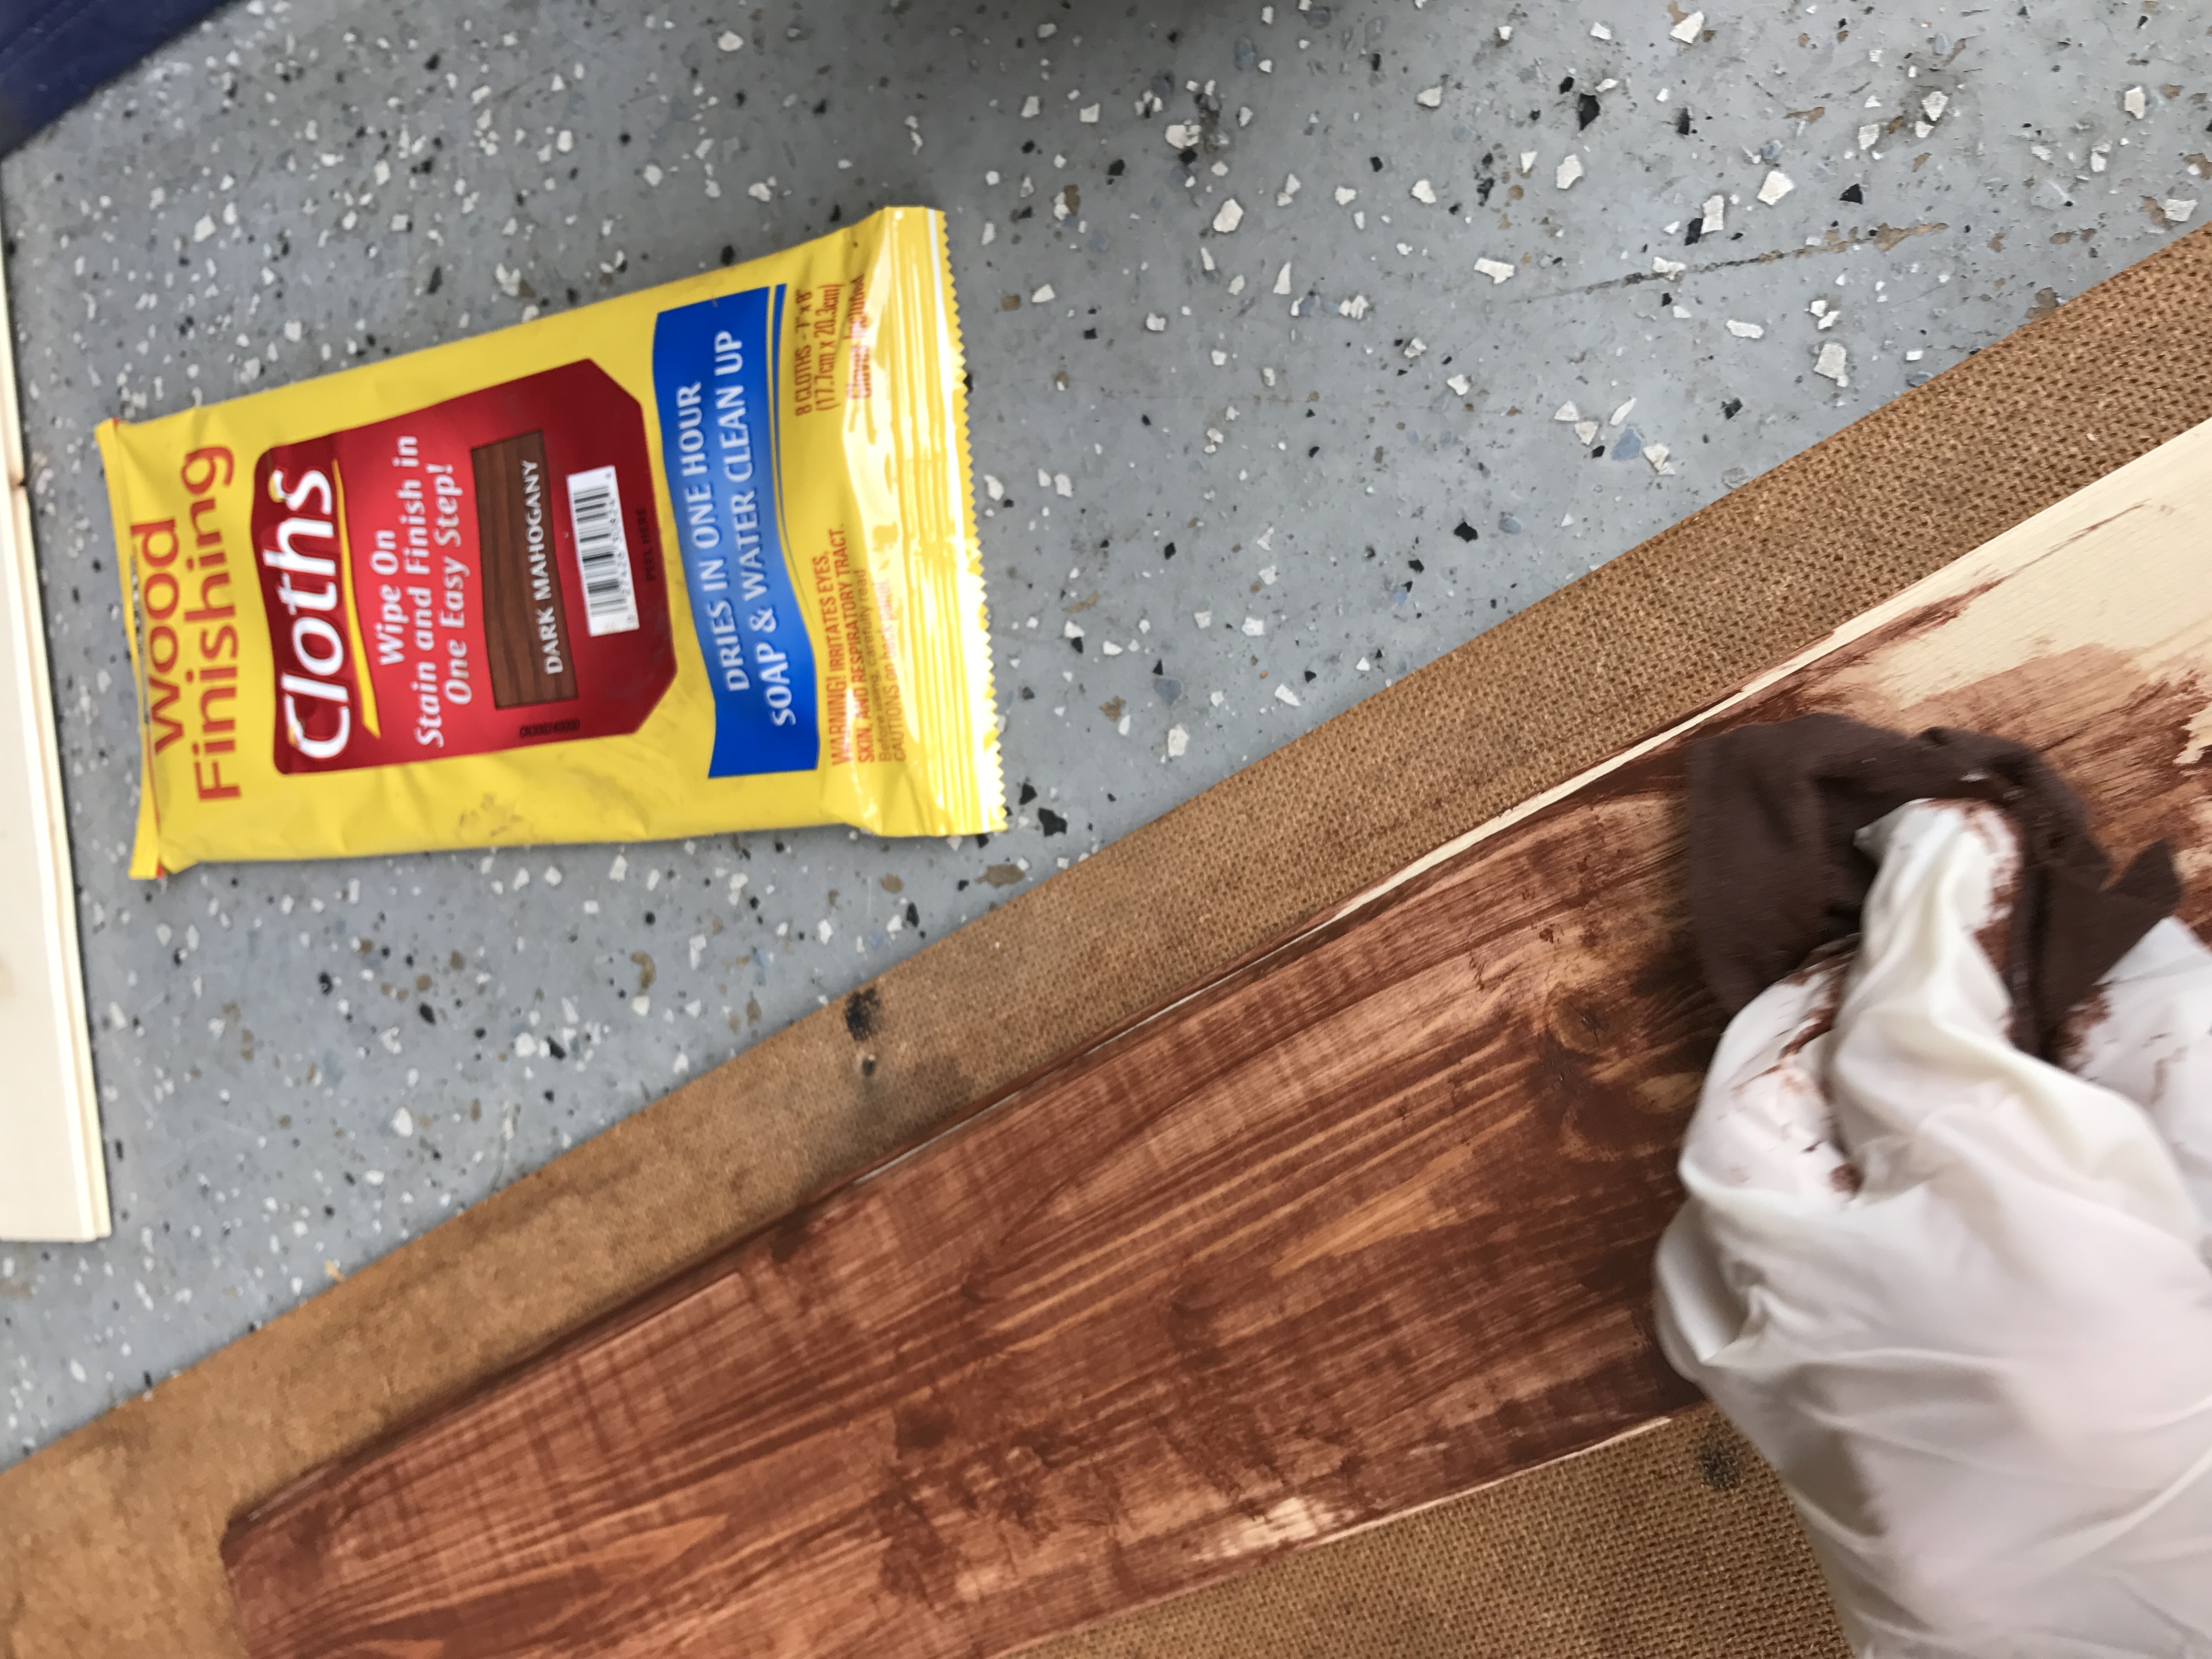
With our pieces cut and fit we needed to go on and do the staining — it’s easier to do that before attaching them. I used this AMAZING product by Minwax, they’re basically staining wipes. I LOVE these things. They’re called Wood Finishing cloths and we can’t sing their praises enough. Make sure you put on some latex gloves before you work with any kind of stain because it’s messy. I had two different colors, one was pretty dark and then one was Natural Oak. The thing I like about this stuff is that not only do they have different colors of stains but you can also wipe stain on a piece of wood, and if you use a clean, smooth cloth for staining, you can wipe the stain right off and it’s then a lighter shade of the stain, so it’s a great way to get varying shades if you need to.
Once our shiplap was cut and the pieces we needed stained were done, it was time to attach the pieces while fitting them together with the groove and tongue design on them. Because these pieces of wood are small and thin, it’s okay to use a brad nailer. For projects with bigger and thicker wood, you’d want to use a regular nail gun. I cannot actually believe this, but our pieces fit across perfectly from side to side. None of them needed to be cut vertically. If they did you can use a jigsaw to cut the vertical pieces. Before we nailed our shiplap onto the stereo, we laid out the pieces on the floor and arranged them how we wanted them. Since there wasn’t really a pattern, we wanted them to look random and to make sure the few dark pieces were spread out, so we knew where we were placing everything beforehand. We also used construction adhesive to attach the shiplap at first. But we decided we needed something more substantial which is when we went with the brad nailer. We didn’t want the pieces popping off.
Next time we will finish where we left off and complete our project. If only real life worked like the blog world!
Jen
Click here for Part Two of our DIY Stereo to Bar Makeover.